
I still look out the window or walk down the street and with every tap of my foot I hear the words ringing in my head... "IM IN LONDON...IM IN LONDON...can't believe Im in London!" This is great! (Insert *pinch* here) Life is good.
So my time in London is coming to a close, we finished the last of the photography today - but not before a took some time to visit the marketplace on Whitecross Street which is filled with FOOD...loads and loads of scrumptious, delicious, mouthwatering .....food....
I thought you might like a look at inside the studio this week.
There's so much that goes into a book, that you might not realize. It's not just a matter of making jewelry and putting the instructions into words and compiling them into a book. There's a lot of brain energy that is involved in designing projects that not only fit a wide range of skill levels, but also those that will appeal to a wide variety of tastes. Then there are the material lists. I personally have a very well equipped studio, but someone just starting out may not. Careful thought into the cost of each project needs to be considered, because, let's face it, if you love the project, but you can't afford to buy the tools or the materials to make it, then what's the point in buying the book right? And what if you the cost of the materials isn't the challenge, but the availability is? If you can't find the materials, all you are left with after you have purchased the book is frustration, right? Who wants that?
So, those are just a few things that are constantly swimming inside my brain as I compile my thoughts, ideas and my scrapbook on the types of projects that will make the final book - and even those change...
The first thing in designing is to completely and utterly make a mess and drag everything you own out....then sit and stare at it for hours taking in all the creative vibes that the tools are sending your way.......oh...and a mason jar of sweet southern ice tea doesn't hurt either. You must make a messy space - it's a sign of a hard days work. Unfortunately it got worse from here and I did spend a day or two cleaning up just to make a brand new mess.

Between the time I sign the contract and I go for photography, I have several emails back and forth from my publisher. The first 10 projects are crucial because I send these ahead for style photography, along with kits and instructions. These are then shot by a professional photographer and stylist and a Blad is made, which is essentially a jacket cover of the book (front and back) with an inside peek at a couple projects. These are useful to the sales team to pre-sell the book to the big book stores and book clubs.
The deadline for the book projects is approximately 3-4 months from the contract date.
Now it's time to make sure that I have all the components ready for the book which includes, of course, the projects, a materials kit for each project, materials list and instruction, tools and loads of product in packaging. Generally for jewelry books, it's not the weight of the tools...but all the bits and pieces that need to be accounted for. Then the big day comes......Im off to London for the photoshoot.!

Generally I work with the same team - which is great. We've been working together for 4 years now and I think we have things down to a science...a tedious science, but non the less we work very well together. Geoff and Marc begin by setting up the photography space and lights. Lighting is so important and I can tell you that many times we feel like we are playing "twister" bouncing light off all kinds of reflectors just to get the right shot.
Photographs are a MAJOR part of the book. As you know, pictures are worth a thousand words and that's exactly what we strive to do in each shot is to tell the "story" on how to make these projects come to life.

Off in the background is my editor, who is also a very accomplished author, Marie Clayton. She is in charge of creating a flat plan so that we know how the projects will be arranged, making sure that the instructions fit the photos and she even graciously types my instructions for me too! Tedious work comparing materials lists to those I use in the real project. We do our very very best to dot our "i"s and cross our "t"'s. She is also the one who keeps us on the move and has a schedule for us to complete each day.

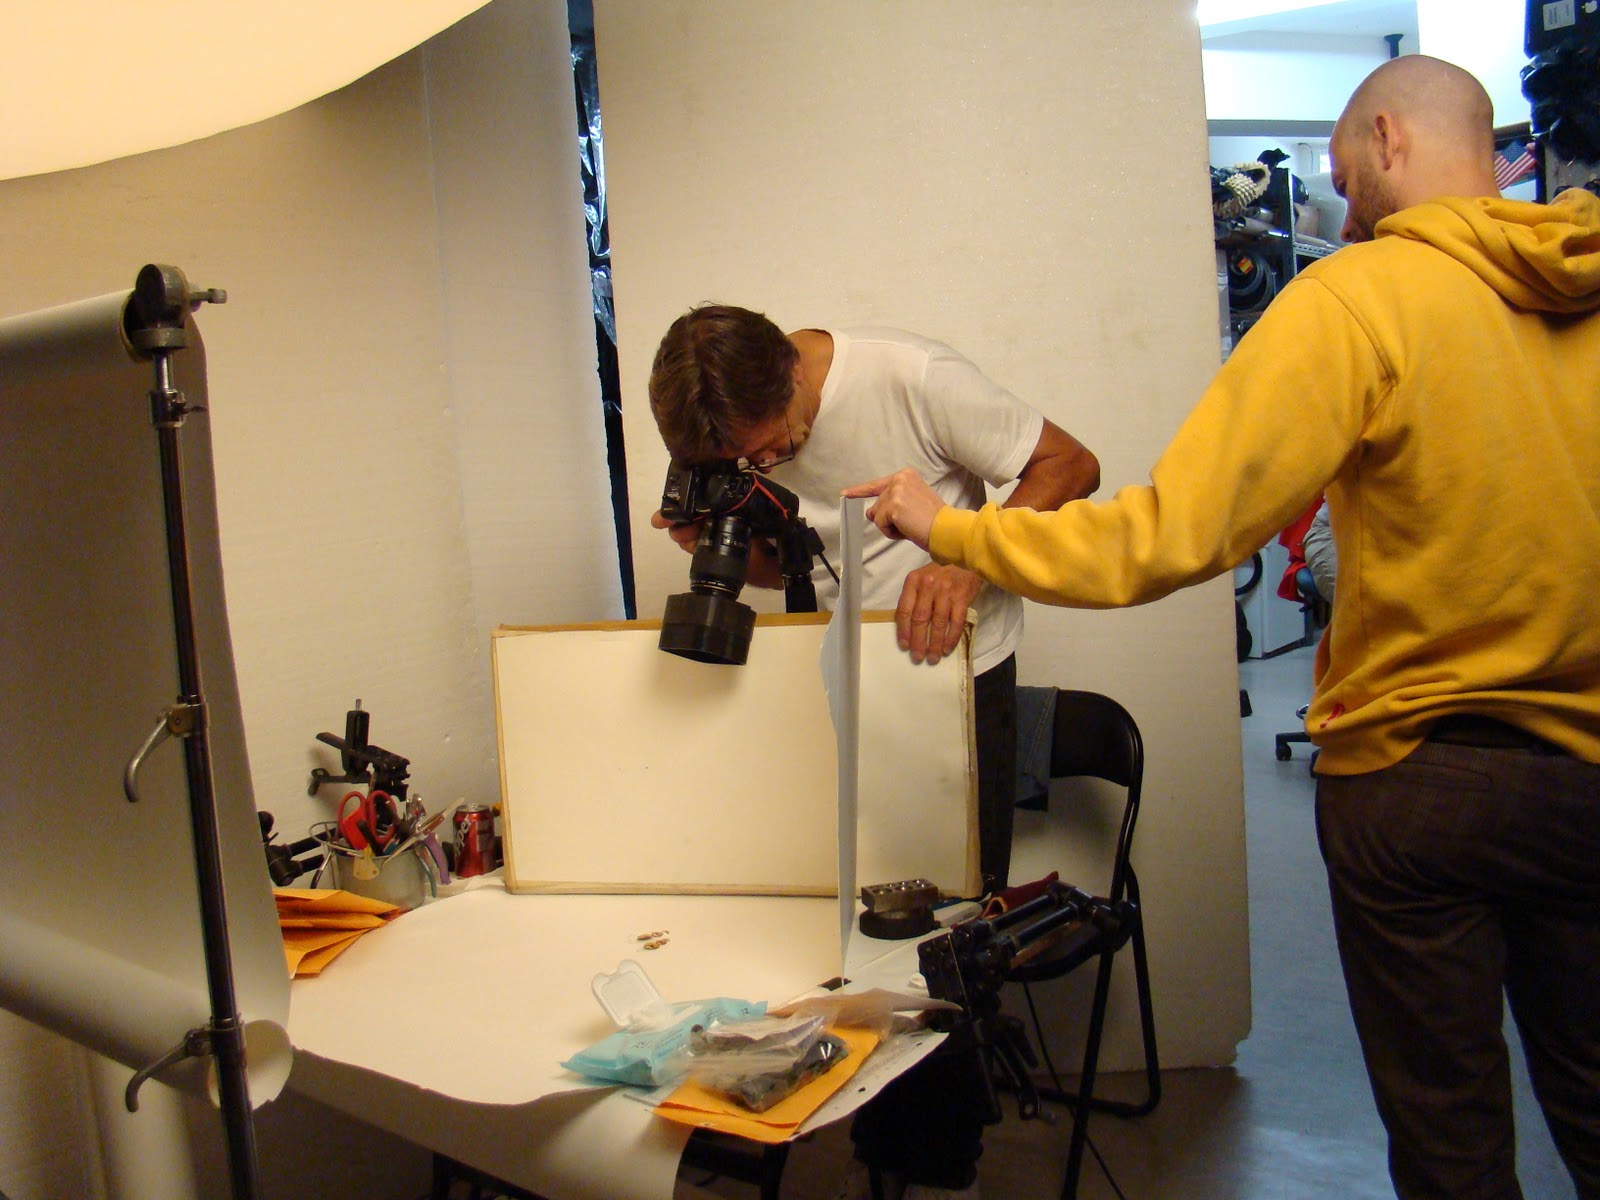
Bright flash on photography is a definate NO NO in the work of photographs. Here Marc is assisting Geoff in bouncing light as one of the finished projects are shot.
Each project has anywhere from 5 to 13 photographs and depending on the complexity and techniques that I want to tell, they can each take up to an hour to shoot the photography.

The words "BE STILL" and "HOLD IT RIGHT" there are sometimes easier said than done........
After the projects are shot, each and every material that goes into the book gets photographed. When the tools and materials are large, the photography is quick, but when they are small and dainty such as beads, it takes alot of time to set up the shot...sometimes as much as 30 minutes.
After all the pictures are finished, I get a lo-res version of them which I compare to the text. Now it is time for me to scrutinize over the text to make sure they tell the story of how to create the piece as easily as possible. I also check the photos against the text, the materials list and add any "fluff" wording such as tips and tricks.
The text is then passed on to my editor who does her run-thru and passes the text to the publisher.
The book designer takes it now and places all the photos with the text. He then produces a copy for me in pdf format. This is my last shot to look over and make any corrections before it goes to press. By now we are several months into the process.
The book is then turned over to the printer...and viola...it magically appears!!! It is exciting to see your name in print I must admit - a very special moment!! Lots of hard work...but soooo well worth the effort.
As I've said before, it's a team effort. I might be the author and have my name on the front cover but there are so many more people who help to produce this book besides just me and I thank them all for their hardwork, talent and commitment they bring to creating a variety of wonderful books!
2 comments:
Hi Linda thank you so much for sharing all of this I love it an a great big Thank You to you an all those that help and work with you to bring us things straight from your heart have missed you thanks for all the pictures also moot of all thank you for your friendship. Prayers continue to go up for you all hugs love and Prayers Love BevinFL
What an amazing insight into how this works. I'm amazed at at the amount of work you're getting done!
(also a little tired on your behalf :D)
All the best for your book !!
Post a Comment