Wednesday, July 8, 2009

LinJen-eered Jewelry - a mix of polymer clay stones and Metal Clay

I know you are probably thinking "What the heck is LinJen-eered?"????!?!?!? Okay..I'll just tell ya!
Back in November 2007 Jen Lowe came to visit me at my house. We crafted, created, experimented....made numerous trips to WalMart throughout the week we worked together and made collaborative art works...a little bit of her...and a little bit of me.....so the term LinJen-eered.
I've been following Jen's blog routinely for several years now and especially the last few days she's been posting about her upcoming trip to the metal clay conference.
So......you can imagine my suprize then I realized that the coral beads were a combination of the real thing.....and polymer clay! They were some of the beads I sent her home with two years ago!!!
So...THANKS JEN! Loved what you did with those beads! And thanks for letting me snatch your blog post today:
Jen writes:

I started out this morning with a single coral tube stone. Put the gecko on it. And then had absolutly no idea where to go! But I think I "went" just fine!!!


Even made matching earrings for the necklace:

Linda Peterson had given me this bracelet almost 2 years ago and it matches so well that I simply added 3 tiny dragonflies to make it a perfect match:

so, the gecko and the dragonflies are .999 fine silver. Pretty cool what you can do with diecut silver on jewelry!

I may actually have to start wearing some of this!!

Don't you wish you were going to the Metal Clay World Conference? It starts one week from right now!!!

Edited to add:

oops! I forgot to mention that the 4 coral looking beads that are round.....those are polymer clay beads that Linda made. They match the cylindar stone perfect! Amazing that you can't tell polymer clay from stone.


Tuesday, July 7, 2009

Project of the Month Club coming this month!

Let's have a mid year special shall we?????

For new members - $10 off when you join one club and $15 when you join both!
Now that's a hot deal!!!! Just email me if you are interested.

Im in the process of designing this month's projects and they will be online later this week...so keep checking back!

Monday, July 6, 2009

A Breathtaking Russian Bead from Artbeads.com


The photo of this Russian Bead does not do it justice. When I opened my package this bead literally took my breath away. I have no idea what design it will become....for this bead is special....and in need of just the right touch. But for now, I'll be happy - more like estatic ...just having this in my collection...and one day it will call out to me and I will make a fabulous design!

Create your next design and wear a true piece of art with one of these gorgeous masterpieces. These beads are hand painted by artisans in Russia , and replicate portions of famous paintings from artists such as Chagall, Mucha, Klimt, Botticelli, Matisse and Picasso. These Russian pendants feature just a small piece of the whole paintings, but in doing so, the essence of the artistry is captured. WOW! oh WOW ..oh Wow!

Are you looking for unique beads...beads that NO one else has??? Check out ArtBeads.com or click here to see more of these beautiful Russian beads.

Thursday, July 2, 2009

Friendly Plastic on Facebook!

Join us on our *NEW* Friendly Plastic facebook page.

Do you know the value of networking? It's priceless! Networking is how I built my craft business - meeting new faces and their friends and their friends and so on!

So, now you have another avenue to promote your Friendly Plastic work and it's on Facebook! Use this page to upload your work and share your ideas with others. We have a great assortment of talent and business contacts who are fans of Friendly Plastic including manufacturers, magazine editors as well as fellow designers.

Join our fan club by clicking here!

Wednesday, July 1, 2009

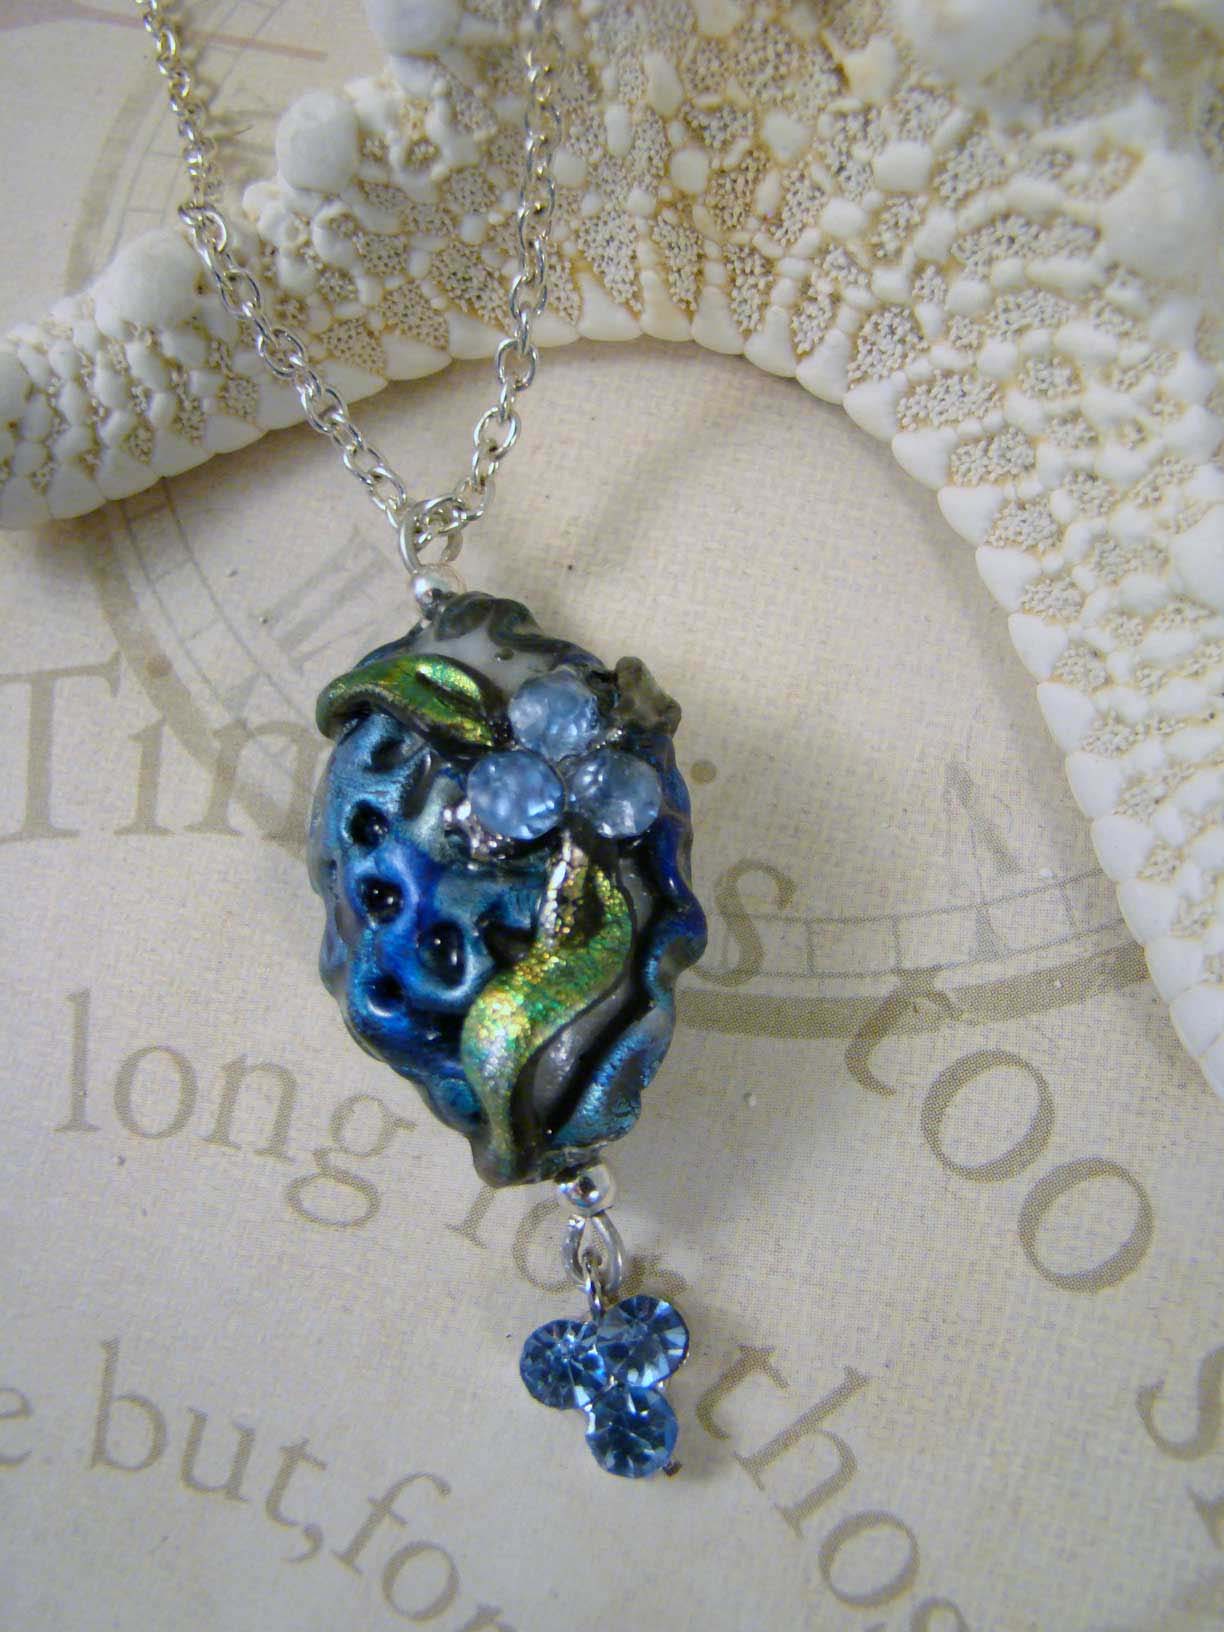
Free Friendly Plastic Project - Blueberries and Lace

Just in time for summer! Enjoy this project courtesy of Amaco and Favecrafts.com

If you love the color blue and you love blueberries this is the perfect craft for you. Make your own jewelry piece. Flaunt your new necklace or bracelet, be proud of what you created.


Materials:


  • Friendly Plastic – 1 oz pellets

  • ProBead Roller - #6 Oval (optional)

  • Friendly Plastic Sticks – advocado/black, metallic turquoise/blue

  • Needle Tool

  • Pearl Ex Powder – pearl white

  • Two Eye Pins

  • E-6000 glue

  • Chain

  • Accent Beads of choice

  • Toggle or clasp

  • Griddle

  • Heat Gun (optional)

  • Non-stick cookie sheet

  • Ball tipped metal stylus – small/medium size

  • Silpat – non stick cookie mat

  • Bowl of Cold Water

  • Scissors (Tim Holtz – work the best to cut plastic)

  • Pliers

  • Baby Oil


Tip: Set griddle to approximately 160 to 180 degrees. Melt Pellets on non-stick sheet until clear. Add a small amount of baby oil to hands and tools to prevent sticking. Use caution when working with the griddle and Friendly Plastic to avoid injury. If Friendly Plastic bubbles it is too hot, remove from heat and lower temperature of griddle.


Instructions:


  1. Working with Friendly Plastic requires a degree of heat and cold water. Generally with each application of heat, there is a cooling in water to set that particular area. That way I can work on a specific area at one time without distorting other areas.


  2. Mix a small amount of Pearl-Ex Powder into the melted pellets. This does not need to be completely mixed as it will create a marbled effect.

  3. Reheat plastic as necessary to soften and continue mixing. When mixing is complete, place plastic onto non stick cookie sheet and heat completely on the griddle.

  4. Cut three 1/8” x 2” wide strips of advocado green and a 1” square of turquoise.

  5. Add a drop of oil to silpat and heat turquoise square. Once soft, press stylus into plastic just inside of edge and press outwards. This creates a scalloped pattern. Continue until you have a pleasing pattern. Cool completely in water.

  6. To create bead in bead roller: Make approximately a 1” ball, place it into the bead roller. Gently place the lid on and roll back and forth applying gradual pressure until bead forms. If bead does not completely form – add more plastic. If it squishes out the sides, remove some plastic then reheat and reform.

  7. To hand form a bead, simply roll into palm of hand and form a pleasing shape. Cool in cold water.

  8. Use heat gun for 5 seconds to lightly soften lacey plastic. Apply to base bead where desired. Use heat gun to manipulate the lace effect into place. Cool in water to set.

  9. Slightly heat green strips and apply to bead as desired. Cool.

  10. Heat the area for the jewels. Press in jewels. Cool.

  11. Using pliers, heat the end of eye pin and press into top and bottom of bead.

  12. Once cooled, remove eye pins and jewels. Secure in place with glue. Allow to dry.

  13. Add to chain along with any accent beads.


Click on a post

Related Posts with Thumbnails